


 Hello there, and welcome to the newest feature on Mint Condition Customs: W.I.P. It! For those who don’t know, the term “W.I.P.” is used in customizing circles. It’s an acronym standing for “work in progress”. I’m going to use this new feature to highlight my past work and give you a closer look at the process I use for creating my custom action figures. I’ll post photos and have a write-up discussing the process as well. I’ll make this a Friday feature. I may not have one to post every Friday, but if I do it will only be on Fridays, for future reference.
For my first W.I.P. It!, I’ll be highlighting my custom Cesar Romero Joker action figure. I feel this is a good one to start off with, since he required a massive amount of work to be done on his head to get him to look like Cesar Romero.
Join me after the jump to get an in-depth look at my creation of the Cesar Romero Joker figure.
 This was towards the beginning of the process. The head started off as a normal DC Universe Classics Joker head. I had to chop off his jaw, and sand it down, then glue it back on so his mouth wasn’t so cartoonish looking. It needed to be more realistic. I also had to use my dremel to sand down a lot of the hair, his eyebrows, and around his eyes as well. I also sanded his nose down.
This was the first stage of sculpting. It’s important to remember in sculpting that to get more detail, you have to work in layers. Sculpt some, let it cure, then sculpt on top of that. So that’s what I had to do to recreate Cesar Romero’s likeness. You can see the beginning of his hair style here, and where I put new eyebrows on him. I also made his jaw more pronounced and even sculpted the mustache on him that Cesar Romero was so famous for.
 Here’s a shot from the side where you can see more of what I had to do. These initial photos look very rough, and when you start sculpting something it’s always going to look like this. That’s ok. There’s more layers to go, and even at the end you still have to lightly sand the entire thing to get rid of all the imperfections.
I had already sculpted his lower lip as well, since it had to be sanded down initially. I wanted to leave his forehead wrinkles there though, since it worked so well to capture Romero’s visage.

From here you can see more of the loose curly hair that Cesar Romero loved to sport. You can also see where I need to get more sculpting done around the mouth.
 This is closer to the final product. I sculpted on his nose to make it slightly more bulbous, and got more sculpting done around his mouth and jawline. I’ve also got the basic shape of Cesar Romero’s hair down here. All the discoloration is just the Apoxie Sculpt I use blended into the white of the head. There would still be quite a bit more sculpting to get from here to the finished product, as well as sanding to remove imperfections.
Thank you for joining me in this first edition of W.I.P. It! To view the final product, click here. I hope you enjoyed this in-depth look at the process for creating my custom Cesar Romero Joker, as well as hopefully gained some insight into the customizing process. And be sure to check back every Friday for future installments of W.I.P. It!
Related Posts
 NECA Superman, Batman, & Joker 7″ DC Movie Action Figures Revealed!
 Tutorial – Masters of the Universe Classics Rio Blast Chest and Gun Backpack Fix
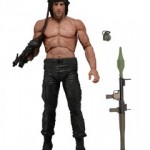 News – NECA Rambo 2 & Bioshock Infinite Booker DeWitt Now Available!
 Tutorial – Shoulder Fix for TMNT Classics 1990 Movie Figures
 Custom Figure – It’s Batman Week with Deathstroke, Joker, & Deadshot Customs!
 News – Hot Toys Teases The Crow 1/6 Scale Figure?